Showing posts with label Cricut. Show all posts

Monday, December 31, 2012

2012 Year in Review

So 2012 was my first complete year of blogging. I decided that I would pick my top 12 cards from the blog (one from each month). I must admit that some months were a toss up because I sometimes had 2 or 3 that I really loved. Here they are:


This was a fun trip down memory lane. It's been good to see my own style develop over the year. That is what blogging has done for me. As long as we create, I think we will continue to discover things about ourselves. Thanks for stopping by. Can't wait for 2013!


Wednesday, October 31, 2012

Boo...

Today I have a couple of things to share with you. First, I have a Halloween banner that I created for the latest Papercrafts submission for Home decor for all seasons. I opted to make a Halloween banner. The good news for me (not the rejection of course) is that this pretty little number is hanging in my house for this Halloween season.
 
 
Secondly, I am sharing the little treats that I made for my daughter's kindergarten class. I used a Martha Stewart recipe to make these little bones. Unfortunately the first batch was a little overcooked. The second batch, which sat in the bowl waiting to be piped, lost its stiffness. Oh well. I do not think these little 5 years will care much about the appearance.
 
 
 I just the love the Friendly Mummy and Friendly Ghost images from DeNami. They are just so stinkin' cute for fun little Halloween projects. I fussy cut all of the images. Fortnately I only had to create 18 treat bags. I used some Papertrey Ink patterned paper for the circle and some Halloween ribbon I picked up at Michaels. I embossed the clear bags with my Swiss Dots embossing folder as well. It is all stuck together using my ATG. Here are just a few.


Tonight we will be trick- or- treating. I had hoped that I might snatch photos of my kiddos in costume this weekend so I could have photos to share, but I didn't. Fingers crossed I am able to take some decent photos tonight. I did make most of Leah's costume. Believe it or not, I tried some of it on her while she was sleeping. You'll just have to wait and see who she is dressed as...

Thanks for stopping by!


Wednesday, September 5, 2012

CAS-ual Fridays, Top of the class

Hello everybody! Last week was so much fun to see everyone's fabulous banners and flag creations. This week's CAS-ual Fridays challenge is to create a clean and simple back to school project.

 
 This week's sponsor is Pretty Paper Studio. This week's winner will receive a gift certificate of about $25.
 

Before I get started with my card, I want to send out a huge welcome to a new Girl Friday, Piali Biswas!!! We are so excited to have her join our team. Please stop by her blog and say hello.

 
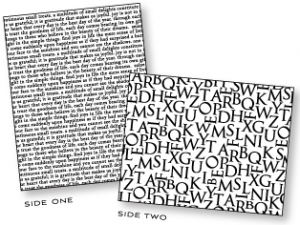
For my card today I used only 1 stamp! I inked up Papertrey Ink's Library Ledger for the handwriting lines and hand wrote the sentiment. For someone who really dislikes their own handwriting, I still went with it. I wanted my card to have that authentic handwritten look. It's hard to see in the photo (trust me when I say I am trying hard to figure out how to better photograph my cards), but I used PTI's Book Print Impression plate. To help you appreciate this detail, here is a photo of the IP. I used side two.


Lastly, I added another one of my apple die cuts from Create a Critter. When I made this card, I decided to make a bunch to have some ready in my stash for the school year. Love it when that happens. Thanks for taking a look. Don't forget that you have until noon on Thursday to link up and play.

Wednesday, August 22, 2012

CAS-ual Fridays, splish splash

Happy Wednesday friends! This morning I have a card to share with you for CAS-ual Fridays. The challenge this week is to create a clean and simple project featuring something you might see in the ocean.


Our fabulous sponsor is Stop and Scrap. This week's winner will receive a $20 gift certificate.


I chose to use this adorable little crab image from my Create a Critter cartridge. He looks as if he is enthusiastically waving his pinchers in the air to wish someone a happy birthday. Isn't he stinkin' cute?! To create my sand, I brushed the dust off my old Creative Memories paper trimmer. I don't think they even make it anymore. I used Papertrey Ink's Sunshine Impression plate to give my card a sun effect.

Thanks for stopping by and remember that you have until noon on Thursday to link up and play!


Stay tuned to my blog for my second post today for a DeNami product spotlight!


Friday, August 3, 2012

Teacher thank-you

Hello, friends! Just popping in with a quick card that I made for my daughter's summer camp teachers. She has attended this school for the last 2 years. Her last day at the school will certainly be an emotional one as she will be changing schools with the start of Kindergarten. She has learned so much from her teachers and I am so thankful for all of the things she has learned. We will miss you so much!

I created this adorable apple using my Create a Critter cartridge. I stamped PTI's Library card image in Soft Stone onto my notebook diecut. The sentiment is from Fillable frames #1 stamped in Dark Chocolate on my double ended banners die cut. Sweet and simple.  Thanks for stopping by!

Saturday, March 10, 2012

Diva

Happy Saturday to everyone! Hope you all had a good week. I have a card to share today for this week's ColourQ Challenge. I fell in love with this inspiration photo.


I had a coworker of mine ask me to make her a card. She simply wanted a card and she happened to want coral and green. She asked for something "Diva". I used my Paisley and Alphalicious cartridges and zero stamping. How did that happen?! I used my Sunshine impression plate. Love that plate! I added glitter, because to me, diva=bling. Enjoy!

Tuesday, February 14, 2012

Happy Valentines Day!

*Warning: this post is pic heavy*

This weekend I had the opportunity to spend some time with family. My sister and her hubby had a very special Valentine's date planned which meant that I got to spend some precious time with my niece, Madeline (almost 4) and nephew, Caleb (just turned 7). So while mommy and daddy were out, I brought some of my craft goodies into the kitchen to let the kiddos make some Valentines for mom and dad. It was the first time that my niece and nephew ever stamped. My daughter, Leah (4 1/2), however, has stamped many times with me before. So, after a quick little teaching, I let them go at it. I limited the stamp sets to 2 and the ink pads to 4. They used my heart and circle punches and I even let them turn the crank on my cuttlebug to add a few last minute accents. They added coloring and writing where their little hearts led them. It was so much fun to see the joy on all of their faces. We had such a blast!


 (Left to right: Madeline, Caleb and Leah)


 Madeline showing off her work

Caleb hard at work

Leah hard at work

I was also able to finally take pictures of the goodies that my daughter helped make to hand out to her classmates. I stamped the ladybug image from 2010 Love Tags and she colored them in with colored pencils. She was an excellent helper stuffing all of the bags full of candy while I stapled them closed and added the ladybug to the topper.

You can also see the Valentine box that we made last year to help collect the goodies that she receives from her classmates. It is a shoebox covered with kraft paper. I had her leave her hand prints on the top and used my Alphalicious cartridge for her name. We have a tradition and make a Valentine's Day album every year. I buy a few things from the Target dollar spot to help make them. When she turned 2 1/2, I got her involved with making her own artwork and scrapbook embellishments. So last year, we made an abundance and I added them to her box for school. I love the fact that we get to reuse this project this year. I realize that her hand prints are from last year, but we love the box. The only input I had on decorating the box was the placement of the Cricut cut outs and the tulle stitched heart. The rest was up to her.


Thanks for looking. Hope your day is fabulous and filled with love!

Monday, February 13, 2012

Valentine's Day banner

Hi friends! Today I have my Valentine's Day banner to share with you. I actually started making it over 2 weeks ago, but never had the chance to quite finish it. If you have ever tried to photograph a banner, you'd understand that it isn't as easy as it looks and there has to be a ton of natural light. The picture ledge where I hang my banners is near my foyer, but if there isn't enough light, there is no chance of taking a picture.

I tried to make my banner a little less feminine for the sake of my hubby. I incorporated some black but I still had to add glitter, of course.


Thanks for looking!

Saturday, February 4, 2012

Three Amigos


"My little buttercup....." Yes, that's right. This week over at CAS-ual Fridays, the challenge is to make a card inspired by a movie. Well, my husband is the movie guru, and when I told him about this challenge, he must've named 15 movies flat: Indiana Jones, Star Wars, Back to the Future... I told him, "Honey, I don't have any snakes, spaceships or time travel stamps." I decided to flip through my Graphically Speaking cartridge and wouldn't you know it, 3 Amigos is a cut out phrase *insert happy dance*. So he pulled out the DVD. After a few minutes, I decided that I would create my card based on the clothing that the 3 Amigos wore.


For my card, I created some ruffled layers out of tissue paper using my Boy Basics: Circles die. I did this to mimic their white "blouses". The pure poppy saddle stitch ribbon represents their cumberbun and "tie". I die cut the sentiment in black, attached it with foam adhesive and finished it off with some bling to represent the rest of their attire.


Friday, January 6, 2012

Misty, misty

Hello blog friends!

I tried my hand at Make-it-Monday #15: Make your own spray mist. I have really wanted to try this for some time. Well, actually I would rather buy some mists, but making my own was rather simple. I decided that I would mist up the wrapping paper that I used for the birthday presents for the parties we will attend this weekend. I put a few good drops of Hawaiin Shores reinker into my Ranger mister and added a little bit of water. I am satisfied with how it turned out, however, I do prefer a more saturated look. I will definitely try this again with my acrylic paints to see the difference.


Here is a close up.

Thursday, January 5, 2012

A wormy birthday

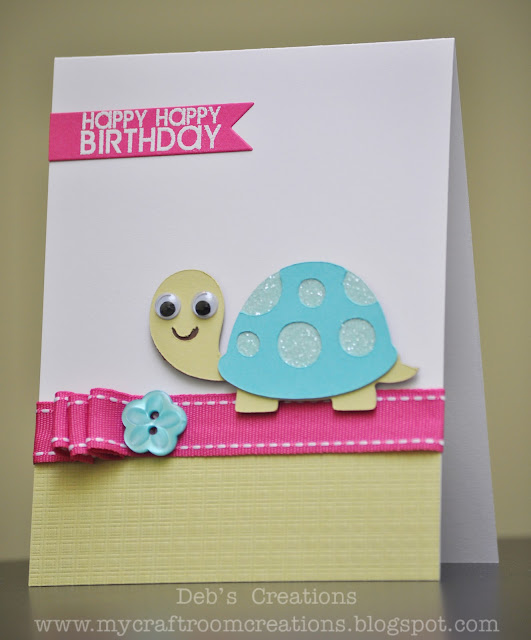
My daughter has been invited to two birthday parties this weekend. I whipped up two identical cards and tags for these little boys. I tell ya, if you don't have this Create a Critter cartridge in your arsenal, you should seriously consider buying it. I have loved making cards for all of her friends. I've made some others here, here, here, and here. Love 'em!!! They all have the basic design as if the critter was sitting on the ground, but slightly different. I used a Make-it-Monday technique of ribbon pleating that I had participated in previously and had so much fun with it.

So, if you happen to be a mommy of one of these boys and a follower of my blog, I am sorry that the surprise may be ruined before the big day. Hope you like them as much as I do.


Saturday, December 31, 2011

2011 Year in Review

If you are looking for Pages with Papertrey, scroll down.

I've decided that I would join my blog friends for a Year in Review. The only problem is that I started blogging in September. So, I decided that I would share my 12 favorite creations from the last few months. These are in blog post order.